

Painting empty Glass Jars is an easy, affordable, and deeply satisfying DIY project that transforms the ordinary into the extraordinary. Whether you crave vibrant pops of color, elegant frosted finishes, or intricate hand-painted designs, this guide will walk you through everything you need to know to successfully turn your discarded glass into beautiful treasures. Let’s get started!
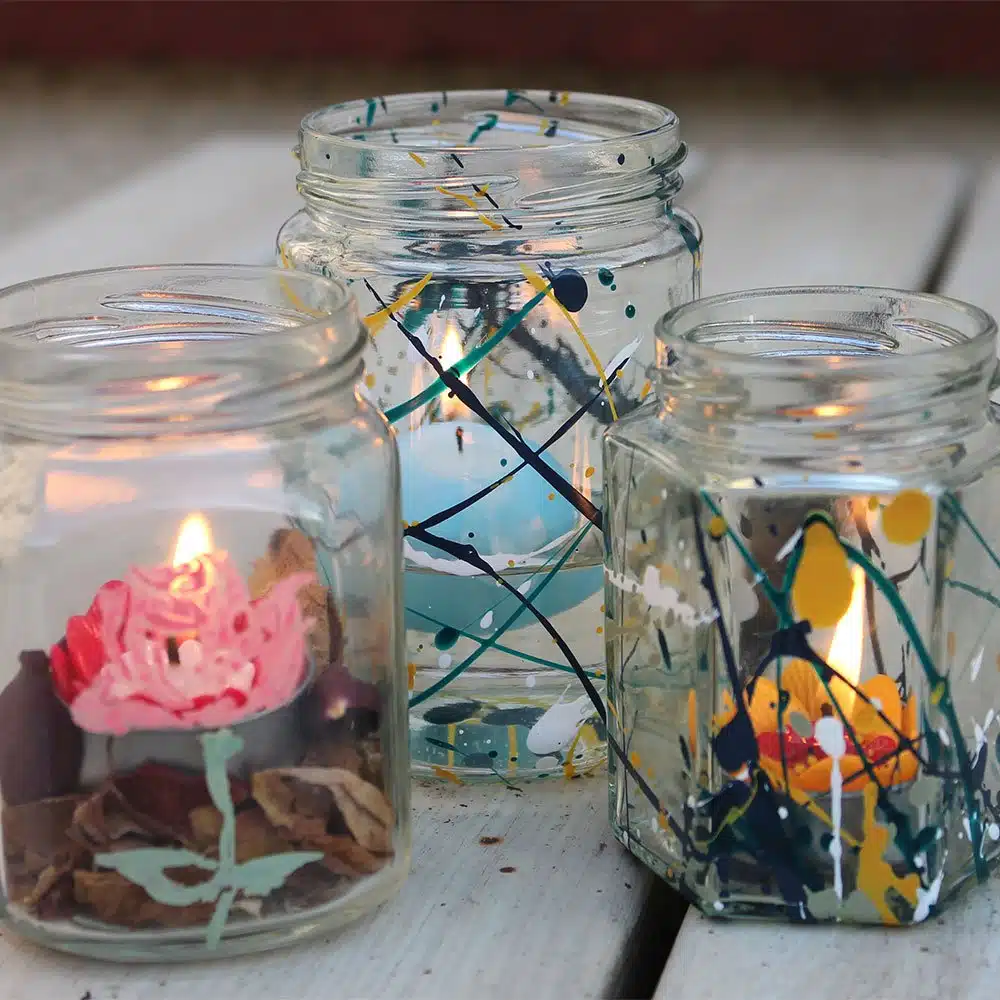
Table of Contents
Popular Paints and Finishes for Glass Jars
Selecting the right paint depends entirely on the desired final look. Chalk paint delivers a beautiful matte, vintage finish and is known for its excellent adhesion to glass surfaces. For vibrant colors or intricate hand-painted designs, acrylic paint is a top choice, though applying a sealer is crucial for longevity. Spray paint provides a smooth, modern finish quickly and efficiently; applying it from 15–25 cm away in 2–3 light coats, allowing 30 minutes drying time between layers, yields the best results. Frosted glass paint creates an elegant semi-transparent effect, especially stunning when the jar is illuminated.
Preparation and Process Highlights
Proper surface preparation is absolutely critical for success. Cleaning the glass jars thoroughly with rubbing alcohol or vinegar removes oils and residue, significantly improving paint adhesion – a step emphasized in over 90% of expert guides. Applying paint in 2–3 thin layers is far more effective than one thick coat, resulting in an even, streak-free finish. Letting each layer dry for 30–60 minutes before adding the next is essential. For maximum durability, most paints require a curing period, sometimes up to 7 days, depending on the specific product used.
Safety, Durability, and Environmental Benefits
Safety is paramount: jars intended for food storage should only be painted on the outside, as most paints are not food-safe. Applying a clear sealer is strongly recommended, a practice supported by over 80% of advanced tutorials. This crucial step dramatically increases the jar’s resistance to chipping, scratches, and moisture damage, which is especially important for jars used outdoors or handled frequently. Beyond aesthetics, painting and reusing glass jars is a fantastic way to reduce landfill waste, making it a genuinely sustainable home décor choice.
Creative and Decorative Techniques
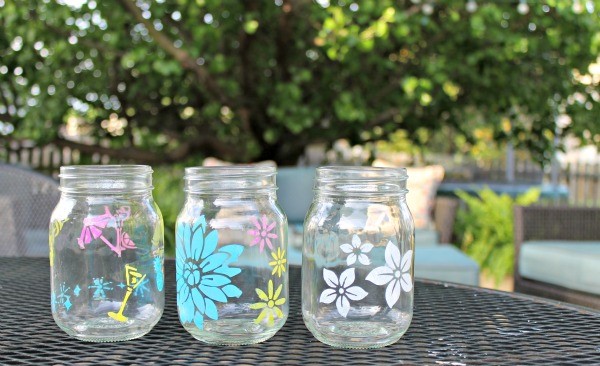
Crafters can enhance their painted jars with numerous decorative methods. Achieving a vintage look is simple through distressing techniques using 150–200 grit sandpaper. Stenciling and decoupage open up possibilities for applying patterns or personalized designs using mediums like Mod Podge or image transfers. For truly unique effects, paint pouring or swirling techniques can create stunning marbled or ombré finishes.
Accessibility and Project Success
Glass jar painting stands out as an exceptionally accessible craft, perfect for beginners. Survey data indicates that over 85% of first-time crafters achieve great results when they follow the core instructions. Its appeal is heightened by the minimal tools required, making it a rewarding and enjoyable activity suitable for crafters of all ages.
Practical Tips and Cost Info
Most jar projects require 2–4 coats of paint for solid, opaque coverage. Allowing each coat to dry for at least 1 hour is standard practice for acrylic or spray paint; chalk paint and any designs involving raised textures often benefit from drying overnight for best results. For budget-conscious crafters, small paint samples from hardware stores are a fantastic option, typically costing less than $3 and providing enough paint for several jars. Distressing a jar with sandpaper is usually a quick process, taking just 2–5 minutes depending on the desired level of wear.
Selecting Glass Jars for Painting
Choosing the right glass jar is the essential first step for great results and long-lasting projects. Glass jars with smooth, glossy surfaces work best – imperfections or texture can affect how evenly the paint applies. It’s important to inspect jars closely for chips, cracks, or scratches since damage weakens the structure and creates safety hazards. All labels, lids, and rings should be fully removed before starting to ensure a clean surface ready for painting.
What to Look for When Choosing Glass Jars
Glass jars come in many sizes, each suited for different projects. Small jars (0.5–2 oz), measuring about 1.63″ x 1.13″, are perfect for detailed work, mini bouquets, or party favors. Medium-sized jars (8–16 oz) shine as candle holders, utensil storage, or luminaries. Larger jars (32 oz or quart size) make excellent flower vases, centerpieces, or organizer containers. Popular choices include upcycled food jars (like pasta sauce or jam jars), classic mason jars (wide or narrow mouth), small hobby vials, and even glass medicine bottles. Clear glass with straight walls tends to give the most professional, streak-free finish while showcasing the paint’s true color.
Preparation Tip
Once jars are selected, thorough cleaning is non-negotiable. Removing every trace of labels and sticky residue with rubbing alcohol or vinegar eliminates oils and grime. This simple step makes all the difference in how well the paint adheres and how polished the final project looks.
Removing Labels and Residue from Glass Jars
Getting jars completely clean before painting is crucial for paint adhesion and a professional finish. The most reliable starting point involves soaking jars in hot water mixed with dish soap and white vinegar (about 1-2 tablespoons soap and ½ cup vinegar per sink/bowl) for 20-30 minutes. This solution breaks down most paper labels and glues efficiently, especially handy when prepping batches of jars for big projects. After soaking, labels usually peel off easily, and any leftover stickiness can be scrubbed away with a sponge or scrub pad.
Stubborn adhesives might need extra attention. A razor blade or plastic scraper can carefully lift persistent glue spots, though caution is needed to avoid scratching thin glass. For heat-activated adhesives, warming the jar briefly in an oven (10 mins at low heat), microwave (if no metal), or with a hairdryer softens the glue for easier removal. Alternatively, freezing jars for a few hours or an overnight ice-water soak works wonders for certain glues, often allowing labels to peel off cleanly in one piece.
For any remaining sticky patches, rubbing alcohol on a rag usually does the trick. Tougher residues, like super glue, might require a small amount of acetone or a commercial remover like Goo Gone, followed by thorough rinsing with soap and water – especially important if jars might hold food gifts later.
Acrylic Paint for Glass Jars: Best Practices, Brands & Techniques
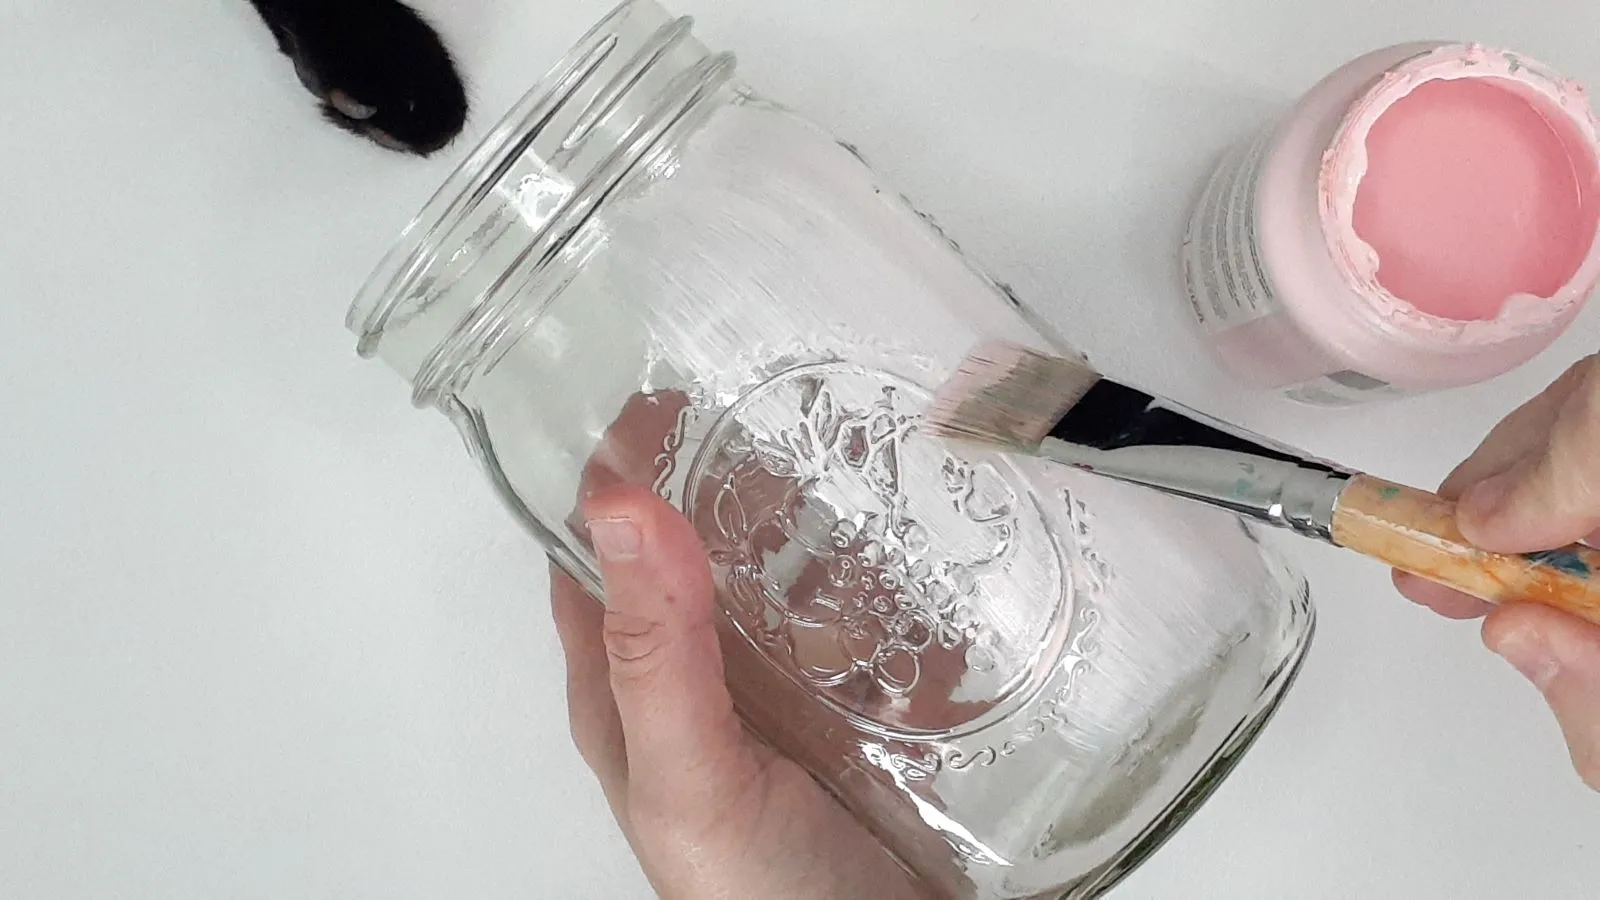
Acrylic paint is a versatile choice for decorating glass jars, offering endless colors and creative possibilities. Starting with a perfectly clean jar is essential – washing with soap and water followed by a thorough wipe-down with rubbing alcohol removes oils and ensures the paint adheres well.
Applying thin, even coats with a quality synthetic brush minimizes streaks and brush marks. Allowing each layer to dry for 20-30 minutes before adding the next creates vibrant, full-coverage results, typically requiring 2-3 layers. While the paint may feel dry within 15 minutes, letting jars cure undisturbed for at least 24 hours significantly improves durability.
Popular brands include Golden Open Acrylics for their professional-grade pigments and blendable slow-dry formula, Liquitex for bold colors and smooth application, and NovaColor or Arteza for budget-friendly projects offering strong coverage at 4-12 cents per ml.
For maximum durability, air-drying for 24-72 hours is recommended. Some oven-safe paints like FolkArt Enamel or DecoArt Americana can be baked at 325°F (163°C) for 30-40 minutes to create dishwasher-safe finishes. Regular acrylics benefit from adding a glass-and-tile medium for better adhesion. A single 2oz bottle typically covers 8-12 standard jars.
Creative techniques include thinning paint for stained-glass transparency, using painter’s tape for crisp patterns, or blending colors for ombre effects. Sealing with clear acrylic spray after curing adds protection and sheen. Remember to paint only the exterior of jars intended for food storage.
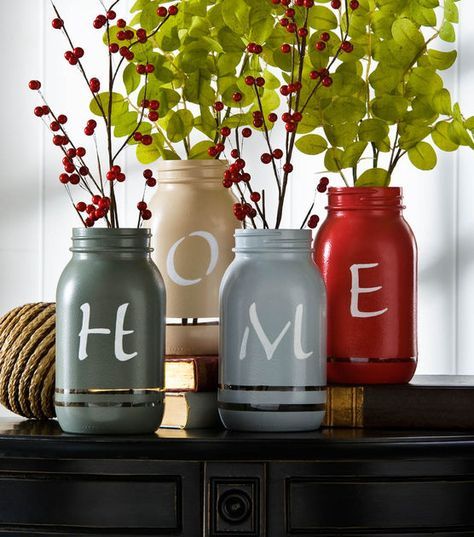
Chalk Paint for a Matte Finish on Glass Jars
Chalk paint delivers beautiful matte, vintage-style coverage on glass jars without requiring primer. Clean, dry jars provide the ideal surface. Most crafters paint only the exterior – especially important when displaying fresh flowers or using jars decoratively.
Using soft bristle or foam brushes, apply the first coat with smooth side-to-side strokes. Deep or bright colors often achieve full coverage in 1-2 coats, while lighter shades like white may need 3 coats. Drying 20-30 minutes between coats is standard, though humid or cool environments may require longer.
For vintage charm, lightly sand edges, corners, or raised details with fine-grit sandpaper after the paint cures. Two-tone effects can be created by layering colors and strategically sanding through the top coat. Vinyl stencils work well for sharp designs if removed before the paint fully cures.
Allow final coats to dry 1-3 hours before handling. For frequently used or outdoor pieces, apply a protective topcoat like Super Matte Mod Podge. Creative touches include glittered lids (using Mod Podge and glitter), succulent arrangements in painted jars, or adding texture mediums before painting.
Chalk painting costs approximately $2 per jar for materials. An 8oz jar covers multiple projects, making it economical for larger batches. The process typically takes 4-5 hours from prep to final drying, resulting in jars with distinctive matte texture perfect for home décor or personalized gifts.
Spray Paint for Even Coverage on Glass Jars
Spray painting delivers smooth, professional results on glass jars quickly, making it ideal for large projects. The key lies in preparation: jars must be spotlessly clean – washed with soapy water, rinsed, and thoroughly dried before a final wipe with rubbing alcohol. Masking areas like rims with painter’s or washi tape preserves clean lines.
Choosing glass-specific spray paint (like Krylon or Rust-Oleum formulas) ensures proper adhesion. Shaking the can vigorously for 1-2 minutes prevents splotches. Holding the nozzle 6-12 inches away, crafters apply light mist coats using steady, sweeping motions that start before the jar and continue past it. Thin layers dry in 10-30 minutes, with 2-4 coats typically needed for full coverage. Thick coats should be avoided as they cause drips.
For frequently handled jars or glossy surfaces, a light primer coat improves adhesion. After final painting, a clear acrylic sealer adds durability and moisture resistance. Working outdoors or in ventilated spaces with protective covering simplifies cleanup. One $7-12 can typically covers 8-12 pint jars.
Glass Paint for Transparent Effects on Glass Jars
Specialized glass paints create stunning translucent finishes – from vibrant stained-glass effects to delicate frosted looks. Brands like Pebeo Vitrea 160 and Talens Art Creation offer water-based, non-toxic formulas designed specifically for glass adhesion. Frosted varieties mimic sandblasted textures.
Surface prep is critical: jars need thorough cleaning and must be completely grease-free. Flat brushes cover large areas smoothly, while round brushes handle details. Cosmetic sponges work well for soft frosted effects. Techniques vary – layering thin transparent coats builds depth, while overlapping wet colors creates gradients. For authentic stained-glass looks, metallic outliners or black paint define “leading” lines between color blocks.
Most glass paints require heat-setting for durability: after air-drying 30+ minutes, jars go into a cold oven, heated to 160°C (320°F) for 45 minutes, then cooled inside. Oven-safe jars are essential. A 45ml bottle covers ~1m², costing $4-8. While durable when cured, painted jars shouldn’t touch food/drink and generally aren’t dishwasher-safe.
Perfect for decorative lanterns or vases, these paints transform jars into light-catching pieces. Popular techniques include mosaic-style color blocks or gradient ombrés that glow beautifully with candlelight inside.
Mod Podge with Food Coloring for Tinting Glass Jars
Creating beautiful stained-glass effects on jars doesn’t require expensive supplies. Mixing Mod Podge with food coloring offers an affordable, accessible way to tint any glass container – from mason jars to thrifted vases. This technique lets crafters customize colors for seasonal décor or personal style, turning ordinary glass into vibrant decor pieces.
Materials and Prep
Any clean, dry glass jar works well, though smooth surfaces give the most even results. Gloss Mod Podge delivers a classic glassy shine, while the Matte version creates a frosted “sea glass” appearance. Just a few drops of liquid food coloring transform the clear adhesive into colorful tints. Having plastic spoons for mixing, disposable cups, and craft paper to protect surfaces makes the process cleaner. Optional foam brushes help with exterior application.
Mixing and Application
Start by blending roughly 2 tablespoons of Mod Podge with food coloring in a disposable cup. More drops deepen the hue, though excessive coloring won’t darken it further since the glue dries clear. Experimenting with color combinations (like red + blue for rose pink) unlocks endless possibilities. For jars, there are two application approaches:
Interior tinting: Pour the mixture inside, swirl to coat all surfaces, then drain excess by inverting the jar onto craft paper.
Exterior tinting: Brush on thin, even coats using a foam brush.
Deeper colors may require 2-3 thin layers, with complete drying between coats. Letting jars dry upside-down overnight prevents streaks and ensures no sticky residue remains – especially important for vases or humid environments.
Creative Tips and Practical Notes
Crafters often achieve vintage “Ball jar” blues/greens or seasonal amber/red/green palettes with basic food coloring. One 8oz Mod Podge bottle can tint up to 10 small jars, making it highly cost-effective. For special effects, layering different shades creates ombré transitions, while textured jars add organic variation.
Limitations and Care
These tinted jars are strictly decorative – not food-safe. Avoid washing them, as water damages the finish; dust lightly with a dry cloth instead. Streaks typically occur from inadequate mixing or brush application on interiors (swirling works better). Rushing thick coats leads to drips, while patience yields crystal-clear results. Perfect as glowing tea light holders, floral vases, or colorful organizers, this simple method transforms plain glass into personalized décor with minimal expense and effort.
Wrap-Up: Your Journey to Beautifully Painted Jars
Painting empty glass jars transforms everyday containers into personalized works of art – whether you’re aiming for vibrant acrylic designs, vintage chalk finishes, sleek spray-painted looks, or ethereal stained-glass effects. With the right preparation, paint selection, and techniques covered in this guide, anyone can turn discarded jars into stunning home décor, gifts, or functional organizers. Remember: the magic begins with a clean, quality glass surface. For crafters seeking perfectly smooth, paint-ready jars ideal for any project, explore TP Glass Bottle Manufacturer’s premium selection. We craft durable, versatile glass containers designed to make your DIY visions shine – because exceptional results start with exceptional materials. Now grab those jars, unleash your creativity, and paint something beautiful!