

Every detail of your product matters in today’s busy market. A well-crafted Custom Glass Bottle shows what your brand stands for. It does more than hold your product. You might be launching a premium drink, a luxury scent, or a craft spirits line. The right glass bottle becomes your brand’s ambassador. It tells your story without words. This guide covers each key step. You’ll learn how to define your brand needs and turn your vision into technical designs. We’ll cover mold development, sample testing, and timeline management. You can do all this without overspending.
Define Your Brand Identity and Bottle Requirements
Your brand’s visual identity drives 93% of purchase decisions. This shapes every choice you make about your glass bottle design. Colors, shapes, and textures must align with what your brand represents.
Start with your brand positioning. A luxury perfume brand needs different bottle specs than a craft beverage company. Premium brands often choose heavier glass (150-300g per bottle) with fine details. Mass-market products use lighter glass (80-120g) with simpler designs. This affects both manufacturing costs and how consumers see your product.
Map your functional requirements next. Consider these practical elements:
-
Capacity needs: standard sizes range from 30ml (samples) to 750ml (spirits)
-
Closure types: Cork stoppers signal premium; screw caps suggest convenience
-
Protection features: UV coating for light-sensitive products adds $0.15-0.30 per unit
-
Dispensing method: Pumps, droppers, or pour spouts based on product viscosity
Color consistency matters more than you might expect. Research shows 81% of consumers remember your brand color before your name. Consistent color palettes increase brand recognition by 80%. Choose glass tints that complement your product. Maintain them across production batches.
Build trust through visual coherence. Brands with consistent messaging across packaging saw 20% revenue increases. Your bottle design must match your website, labels, and marketing materials. This consistency creates the trust that drives 90% of consumer purchases.
Budget planning requires specific numbers. Minimum order quantities start at 5,000-10,000 units for custom molds. Mold development costs range from $2,000-$8,000 depending on complexity. Unit prices drop with volume: a custom 375ml bottle might cost $1.20 each for 10,000 units but $0.65 each for 100,000 units.
Document these requirements before contacting manufacturers. Specific technical parameters prevent expensive revisions. They ensure your final product matches your brand vision.
Design Your Custom Bottle: From Concept to CAD
Your brand vision needs to become a real glass bottle. This happens through four clear design stages. Each stage adds precision. Each stage catches problems before production starts.
Start with freehand sketching to explore possibilities. Grab a pencil and paper. Draw 10-15 rough concepts. Don’t worry about perfection. This creative phase costs nothing. But it unlocks your most innovative ideas. Sketch different neck styles. Try various base shapes and body profiles. Picture your product on a shelf next to competitors. This hands-on work reveals design opportunities that computer work misses.
Move to detailed 2D vector design next. Adobe Illustrator works best for technical bottle drawings. Create precise outlines with exact measurements. A spirits bottle design includes shoulder angle (15-45 degrees). Add neck diameter (18-28mm for standard closures). Include body taper ratios. These vector files become your blueprint. Manufacturers use them to understand every curve and dimension. Export multiple views: front elevation, side profile, and top-down perspective. Add measurements in millimeters for clarity.
3D CAD modeling brings your design to life. SolidWorks or Rhino converts your 2D vectors into three-dimensional models. This stage reveals problems you can’t see in flat drawings. Does the bottle balance well? Will the base support the weight after filling? CAD models calculate glass thickness needs (2-4mm for standard bottles, 4-6mm for premium designs). They also determine exact volume capacity within 1ml accuracy.
Run simulations before building prototypes. Your CAD model enables multiple virtual tests:
-
Visual rendering with labels applied: See how graphics wrap around curves and corners
-
Shelf presence simulation: View your bottle among competitor products under retail lighting
-
Pressure resistance analysis: Test structural strength for carbonated beverages (6-8 bar pressure)
-
Ergonomic evaluation: Check grip comfort for different hand sizes
Create physical prototypes to validate your design. 3D printing produces quick test models in resin or plastic for $50-200 per unit. You can hold your bottle. Test cap fit. Evaluate pouring experience. CNC machining creates more accurate prototypes. These use materials closer to glass density. Budget $300-800 for CNC prototypes. This investment prevents expensive mold corrections later.
Share prototypes with focus groups. Their feedback catches design flaws your team might miss. Does the bottle feel too light? Is the neck too narrow for ice cubes? These insights refine your CAD files before final approval. Each design change at this stage saves thousands in mold revision costs.
Mold Development and Sampling Phase
Glass bottle molds are your biggest upfront cost in production. Two mold types exist. Each serves a different purpose. Know the cost difference – it saves you serious money.
Sample molds test your design before mass production. These simple molds make 50-500 bottles for quality checks. A basic sample mold costs $800-$2,500. This single-cavity tool makes one bottle per cycle. Sample molds use lower-grade steel (P20 or 718 steel). They skip some finishing details that production molds need. Your manufacturer makes these molds in 15-25 days.
Production molds handle high-volume manufacturing. Full production tooling costs $3,500-$12,000. The price depends on how complex your design is. Multi-cavity molds make 4-8 bottles at once. They use hardened steel (H13 or S7). This steel lasts for 500,000+ production cycles. Production molds have exact cooling channels. They have polished surfaces that make perfect glass finishes. Making these takes 35-50 days.
The cost gap between mold types affects your strategy. A standard 500ml spirits bottle needs a $1,800 sample mold. A production mold costs $6,500. That’s a $4,700 difference. Many brands start with sample molds. This checks if the design works. They test cap fit, label placement, and shipping strength. Samples pass all quality checks? Then invest in production tooling.
Sample bottles show manufacturing problems right away. Your first samples might show uneven glass thickness. The shoulder might create stress points. The base could be unstable. These issues pop up during the 3-5 sample runs. Fixing them costs $200-$600 in sample mold changes. Production mold fixes? Those run $2,000-$5,000.
Budget for both mold types on new designs. Smart brands set aside $2,000 for sampling and $7,000 for production molds upfront. This two-stage plan cuts risk. You check every design detail before spending big on production tooling. The sampling phase adds 4-6 weeks to your schedule. But it stops expensive production mistakes.
Get 20-50 sample bottles minimum. Test them like you’ll use them. Fill them with your product. Put labels on. Ship them cross-country. This complete check means your production mold makes perfect bottles from day one.
Evaluate and Approve Samples
Your sample bottles arrive after 4-6 weeks of mold development. This moment decides if you move to mass production or need revisions. A thorough check catches problems that could ruin entire production runs.
Measure dimensional accuracy first. Use digital calipers for precision checks. Your bottle specs include tolerances (±0.5mm for body dimensions, ±0.2mm for neck finish). Check these key measurements:
-
Overall height against CAD specs
-
Body diameter at multiple points (top, middle, base)
-
Neck opening diameter (18mm, 24mm, or 28mm for standard closures)
-
Base thickness (minimum 3mm for stability)
-
Wall thickness consistency (should vary less than 0.3mm)
Measure 10-15 samples. Variations beyond tolerance mean mold adjustments before production.
Inspect visual quality under bright lighting. Glass defects show up fast. Look for bubbles trapped in the glass (acceptable if under 1mm diameter). Check for surface ripples or waves. Examine stress marks around the neck and base. These flaws weaken the bottle. Bottles with these issues break during filling or shipping.
Run real-world filling tests next. Fill 20 samples with your actual product. Water-based products act different than oils or alcohol. Test at room temperature and refrigerated. Watch for leaks at the neck junction. Check if liquid levels look consistent across bottles. Uneven internal volumes mean mold cavity problems.
Cap compatibility testing prevents future headaches. Your closure system must seal right. Test three aspects:
-
Application torque: Screw caps need 8-12 inch-pounds for proper sealing
-
Removal force: Consumers struggle with caps over 15 inch-pounds
-
Seal integrity: Invert filled bottles for 24 hours. Zero leakage is mandatory
Cork stoppers need different checks. Insert and remove corks 10 times. The neck finish should show no chipping or cracking. Cork compression should be 20-25% for proper seal without breaking glass.
Approve samples after all tests pass. Document any needed changes with photos and measurements. Send detailed feedback to your manufacturer. Most mold adjustments take 7-14 days and cost $300-$1,200 depending on complexity.
Surface Finishing
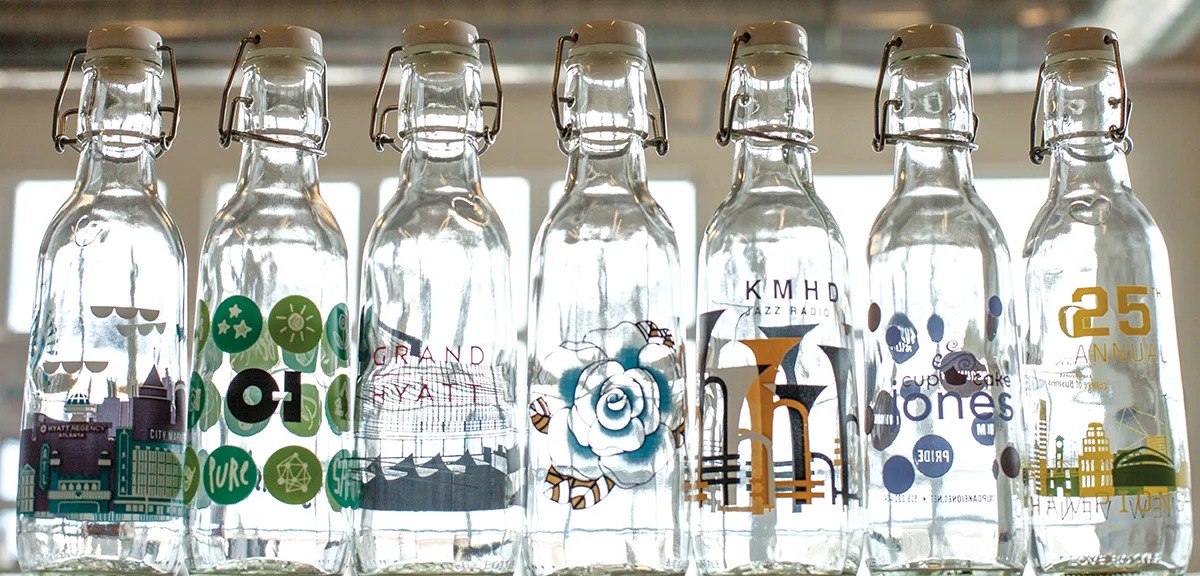
Glass bottle decoration turns plain containers into brand statements. Your finishing choices affect visual impact and how long the design lasts. This decision shapes how customers see your product quality.
Four main surface treatments lead the custom glass bottle industry. Each offers different looks and price points. Screen printing puts ink right onto glass surfaces. Costs run $0.08-$0.25 per bottle based on color count. This method works well for simple logos and text. Hot stamping uses metallic foils pressed onto glass with heat. Gold and silver finishes cost $0.15-$0.40 per unit. The metallic shine creates a premium look for spirits and perfumes. Acid etching creates frosted patterns by treating glass surfaces with chemicals. This permanent finish costs $0.20-$0.50 per bottle. Spray coating applies colored finishes in gradients or solid coverage. Full-bottle coating runs $0.30-$0.80 per unit.
Decals versus direct printing – a key choice. Ceramic decals transfer pre-printed designs onto glass through high-temperature firing (580-620°C). This bonds the design into the glass surface for good. Decals handle complex, multi-color artwork better than direct printing. They reproduce photo-quality images and detailed patterns. The cost ranges from $0.25-$0.65 per bottle based on design details. Direct screen printing applies ink straight onto the bottle in 2-6 colors maximum. Simple two-color logos cost $0.12-$0.20 per bottle. Direct printing works faster for basic designs. Setup costs stay lower. But color blending and fine details don’t match up to decals.
UV printing beats traditional methods for durability. Traditional screen printing inks cure through air drying or heat (150-180°C). These inks scratch off with repeated handling. Dishwasher cycles fade them within 10-15 washes. UV-cured inks harden right away under ultraviolet light. The bonding creates scratch resistance 3-4 times stronger than regular inks. UV printing survives 50+ dishwasher cycles without visible wear. This matters for reusable bottles in premium beverage markets. UV printing costs $0.18-$0.35 per bottle. That’s 40-60% more than standard screen printing. But you get your money’s worth. Products keep their shelf appeal longer. Customers see higher quality.
Layer multiple finishing techniques for maximum brand impact. Many successful brands stack treatments. A frosted base coat ($0.25) topped with metallic hot stamping ($0.30) creates depth. Total finishing cost hits $0.55 per bottle. This dual-layer approach makes your product pop on crowded shelves. Test samples with all proposed finishes applied. Check how they look under retail lighting. Make sure they survive your distribution handling.
Timeline Planning and Cost Management
Custom glass bottle projects take 90-120 days from start to first shipment. Track these milestones to keep your project moving.
Design and approval: 3-4 weeks. CAD modeling takes 5-7 business days. Internal reviews and design changes need another 10-14 days. Rush this step? You’ll pay for mold fixes later. Those corrections cost $1,500-$4,000 and add 2-3 weeks.
Sample mold production: 15-25 days. Simple round bottles finish in 15-18 days. Bottles with embossing or special neck finishes take the full 25 days. Ask your manufacturer for their production schedule early. Chinese New Year and summer breaks can delay things by 2-4 weeks.
Sample review and testing: 2-3 weeks minimum. Samples ship to you in 7-10 days by air or 30-40 days by ocean. Run your quality checks. Test with real products. Get approval from decision-makers. Plan extra time if samples don’t pass first tests.
Production mold build: 35-50 days. High-volume molds with multiple cavities take longer. Six-cavity molds need 45-50 days. Dual-cavity versions take 35-40 days. Start production molds while testing samples. This saves 4-6 weeks.
Know your cost breakdown to avoid surprises. Your total budget splits into five parts:
-
Mold costs: Sample mold ($800-$2,500) + Production mold ($3,500-$12,000)
-
Per-unit bottle price: $0.45-$2.80 based on size, shape, and glass thickness
-
Surface finishing: Screen printing ($0.08-$0.25), UV coating ($0.18-$0.35), or decals ($0.25-$0.65)
-
Minimum orders: 5,000-10,000 units for custom molds, 10,000-30,000 for decorated bottles
-
Shipping: Ocean freight ($0.12-$0.18 per bottle), air freight ($0.40-$0.65 per bottle)
Larger orders mean lower prices. A 500ml custom bottle costs $1.35 each for 10,000 units. Order 50,000 units? The price drops to $0.85. That’s 37% less. Order 100,000+ units and you’ll pay around $0.65 per bottle.
Stock bottle changes save money. Manufacturers have standard molds for common shapes. Add your custom design to an existing round bottle mold for $1,200-$2,800. A brand new mold costs $6,500. You give up some unique design features but save 60-75% upfront.
Conclusion
Custom glass bottles do more than hold your product. They extend your brand and catch customers’ eyes on the shelf. You need to define your brand first. Then move through mold design, surface treatments, and budget plans. Each step matters in making your vision real. The process takes patience and close attention to detail. You’ll also need the right manufacturing partners.
As you embark on this journey of customization, partnering with an experienced manufacturer makes all the difference. At TP Glass Bottle Manufacturer, we specialize in turning brand visions into tangible, high-quality glass realities. With our expertise in custom design, advanced craftsmanship, and dedicated customer support, we ensure your bottles not only look exceptional but also align perfectly with your production and sustainability goals.
Ready to create something remarkable? Let’s build your brand’s signature bottle together. contact us today to start your custom project.