

Got an empty candle glass jar hanging around? You know the one – the wax is all gone, but it’s still stuck to the glass. Want to reuse that jar for something else, like storing pens or making a new candle? Good news: it’s way easier than you might think. You don’t need any special tools – just stuff you’ve probably got at home, like your freezer or some hot water. Here’s how to get that old candle out of its jar safely and cleanly.
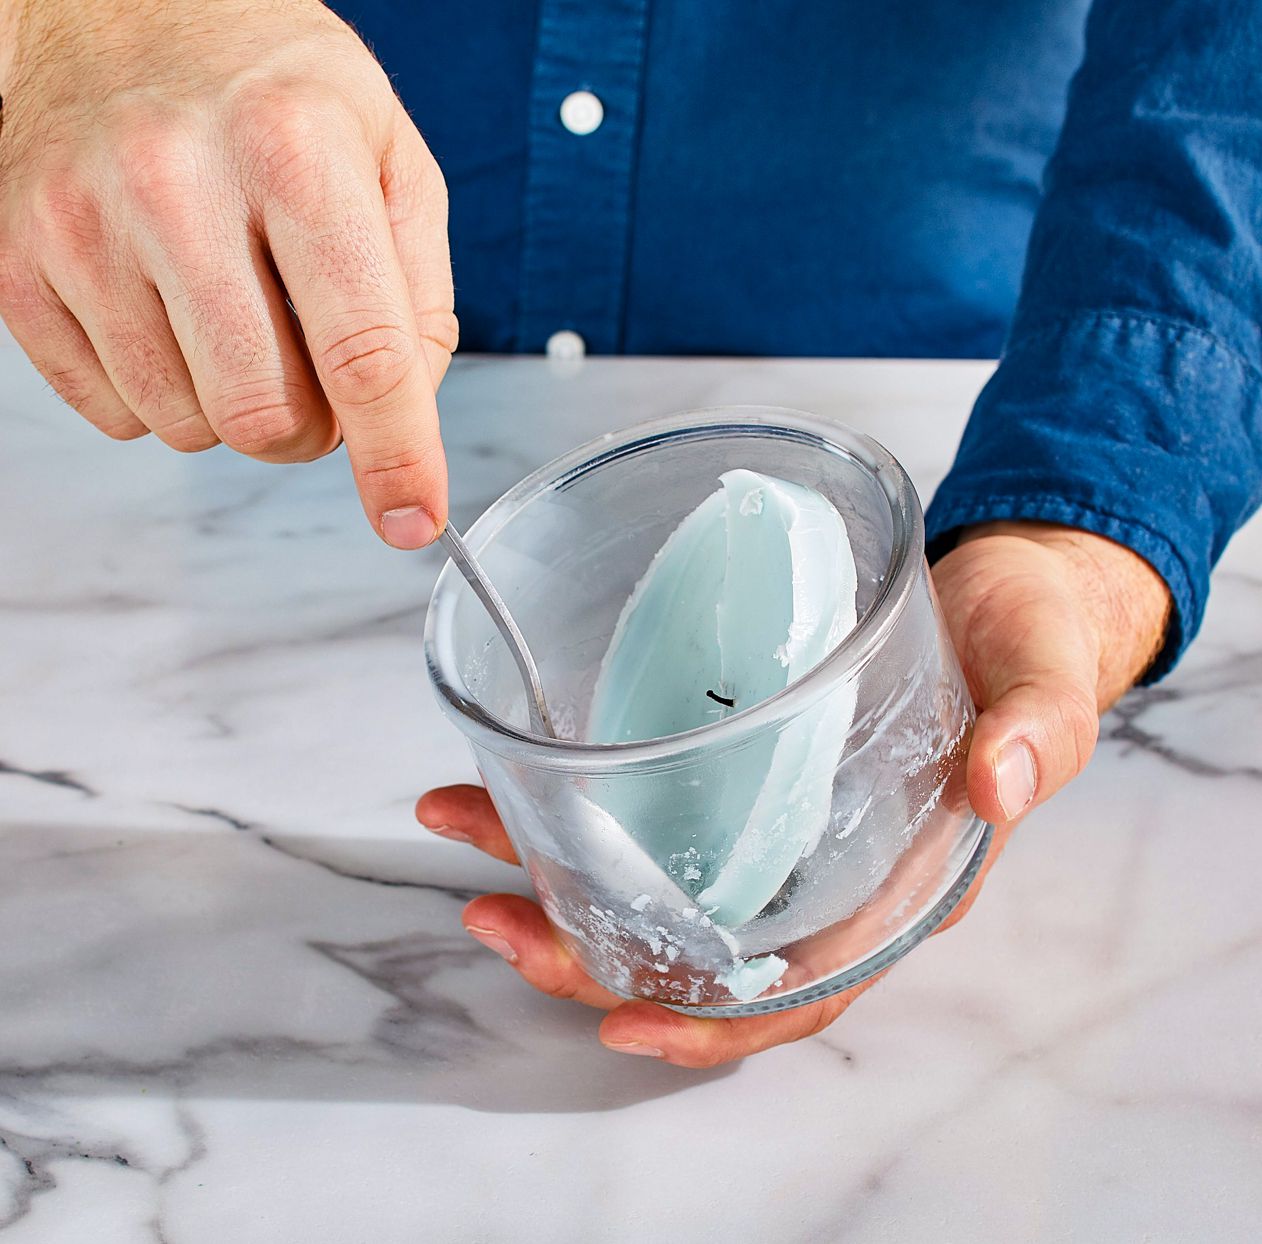
Table of Contents
The Freezer Method: Removing Candle Wax from Glass Jars
The freezer method is widely considered one of the simplest and most reliable ways to remove leftover candle wax from glass jars. It relies on the natural shrinkage of wax when frozen, making cleanup straightforward and safe.
How It Works
To start, place the used candle jar in the freezer. Leaving it for 3–5 hours usually works, but an overnight freeze yields even better results since colder temperatures cause greater contraction. This shrinkage helps the wax pull away from the glass walls.
Removing the Frozen Wax
Once the wax is fully frozen and solid, a blunt tool like a butter knife or spoon can be used to gently break the wax into chunks. Working around the edges typically loosens large sections that lift out easily. If any wax resists, turning the glass jar upside down and giving it a light shake often helps—gravity usually assists in releasing stubborn pieces.
Handling Residue
A thin film of wax sometimes remains after removing the main chunks. This residue can be scraped off with a spoon or dull edge. For any lingering bits, washing the jar with warm, soapy water finishes the job.
Why This Method Works Well
This approach has a high success rate across various glass jar styles, from basic containers to decorative holders. It’s notably safe—no hot water, flames, or harsh chemicals are needed. Using blunt tools also minimizes the risk of cuts or jar damage.
Reusing Your Clean Jars
Once cleaned, the glass jars are perfect for repurposing. They make great organizers for small items like makeup brushes, pens, or craft supplies. Even the leftover wax chunks aren’t wasted—they can be melted in a wax warmer to enjoy the remaining fragrance.
Pro Tips for Best Results
For easiest removal, freezing overnight is recommended. Gentle pressure with safe tools protects both hands and glass. This method is particularly helpful for oddly shaped glass jars or tenacious waxes that resist other removal techniques.
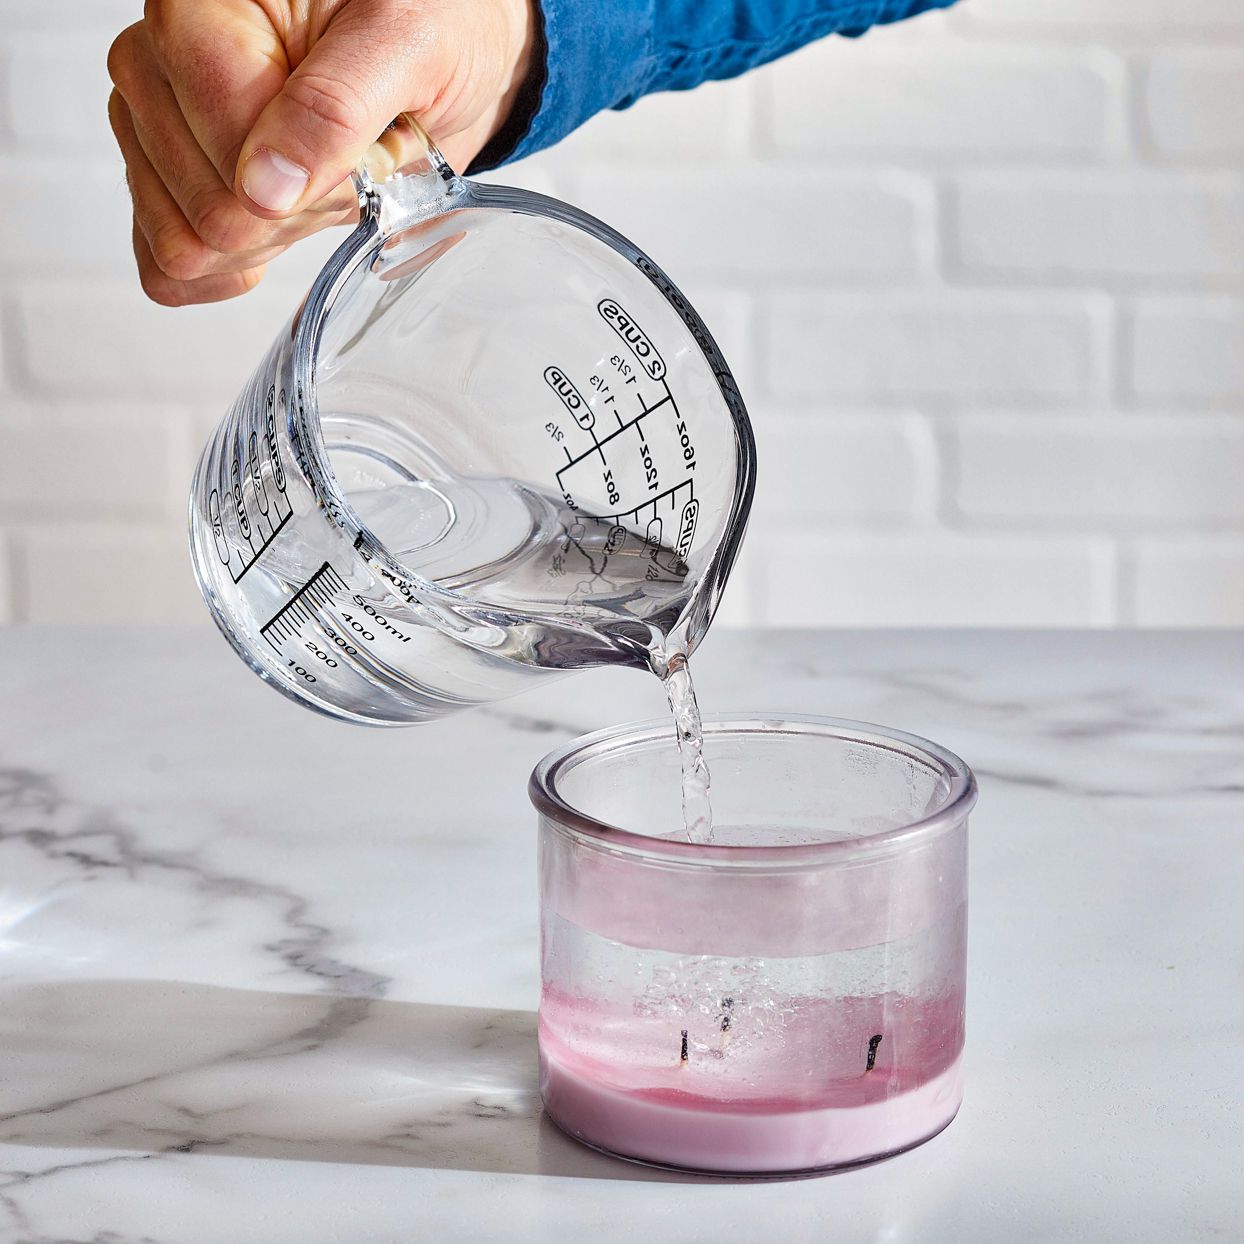
Hot Water Method: Removing Candle Wax from Glass Jars
The hot water method offers a straightforward way to clean candle glass jars without freezing. Using simple household items, this approach efficiently melts and separates wax from glass through controlled temperature changes.
Getting Started
Begin by poking a few holes in the leftover wax with a chopstick or skewer. These channels allow hot water to penetrate deeper into the jar, speeding up the melting process and ensuring even heat distribution.
Pouring and Melting
Heat water until nearly boiling (around 90–100°C / 194–212°F), then carefully pour it into the candle glass jar until the wax is fully submerged. As the wax melts, it naturally separates from the glass walls and floats to the surface since it’s lighter than water. Let the jar sit undisturbed for about an hour as the water cools – during this time, the wax solidifies into a cohesive layer on top.
Removing the Wax
Once cooled, the hardened wax typically forms a solid disc that lifts out easily with a spoon or fork. Pour out the remaining water afterward. For any lingering residue, a soak in warm soapy water followed by gentle scrubbing with a sponge usually does the trick. Stubborn adhesive from labels often comes off during this step too.
Practical Considerations
While highly effective for standard candle glass jars (like common 8oz containers), taller or irregularly shaped vessels might require repeating the process. Caution is advised when handling hot water to prevent burns, and thinner glass jars should be treated carefully to avoid thermal shock cracks.
Why It Works Well
This method requires minimal tools – just hot water, basic utensils, and soap. The total active time rarely exceeds 5 minutes, though the cooling period adds about an hour. Its success rate remains high for most wax types, and it’s particularly useful when immediate freezer space isn’t available.
Repurposing Cleaned Jars
Jars cleaned this way emerge residue-free and ready for new uses. They’re perfect for organizing craft supplies, holding kitchen utensils, or even replanting small succulents. The process also allows recovery of leftover wax for reuse in wax warmers.

The Oven Method: Removing Candle Wax from Glass Jars
The oven method offers an efficient way to tackle stubborn candle wax, especially when cleaning multiple jars at once. By gently melting the wax, this approach simplifies removal and works well for thick or wide containers.
Getting Set Up
Start by preheating the oven to 100°C (212°F) – a low enough temperature to melt wax safely without risking most glass jars. Line a baking sheet with aluminum foil to catch drips and prevent messy cleanups later. Place the candle jars upside-down on the foil, spacing them apart so melted wax doesn’t blend between different scents.
Melting Process
Slide the baking sheet into the oven and let the candle glass jars warm up. Most standard jars release their wax in about 15 minutes, though larger or denser candles (like wide 14oz triple-wick styles) might need 45–60 minutes. It’s smart to stay nearby during this process: keep the kitchen well-ventilated and peek in occasionally to check progress. Glass can get extremely hot, and flawed jars might rarely crack under heat stress.
Cooling and Cleanup
Once the wax has fully dripped out, carefully remove the baking sheet using oven mitts and set it on a heat-safe surface. Let everything cool completely before handling. The hardened wax puddles on the foil peel off easily for reuse or disposal. Finally, wash the jars with warm soapy water to remove any residual film or soot – a sponge usually handles this quickly.
Why Choose This Method
This technique shines for batch processing, letting users clean several jars in one go. It reliably handles most wax types, including soy-based blends, and excels with wide-mouthed containers that frustrate other methods. The collected wax remains usable for crafts or upcycling, and the jars emerge ready for new purposes like storage or DIY projects.
Safety Tips
Stick to sturdy, thick-walled jars (like common candle brands) and avoid delicate, thin, or ornate glass that might crack. Never leave the oven unattended during the process, and always open a window for ventilation. While generally safe, treating hot glass with respect prevents accidents.
The Double Boiler Method: Removing Candle Wax from Glass Jars
This stovetop technique works particularly well for softer waxes like soy or coconut candles, which melt at lower temperatures. By gently heating the candle glass jar in water, the wax releases cleanly with minimal effort.
Setting Up
Place the candle jar inside a heat-safe bowl or large pot. Fill the surrounding space with water until it reaches about halfway up the jar’s sides. The key is to heat the water to a gentle simmer – around 185–200°F (85–95°C) – avoiding a rolling boil. Rapid temperature changes could risk cracking thinner glass.
Melting and Removing the Wax
As the wax softens (typically 5–10 minutes for soft waxes), a butter knife or spoon can gently pry it loose from the jar. If the wax doesn’t release completely on the first attempt, simply pour out the melted portion and repeat the simmering process. Stubborn or thicker waxes might need multiple rounds or extended time – occasionally up to several hours for full removal.
Handling Leftovers and Cleanup
After removing the bulk of the wax, any lingering residue can be washed away with warm soapy water. The collected wax chunks harden within 1–2 hours, making them ready for reuse in wax warmers or crafts. One practical note: prolonged water exposure may cause paper labels to peel, so those wanting to preserve candle glass jar decorations should take extra care.
Why This Method Shines
The double boiler approach preserves wax in reusable chunks and minimizes scorching risks. It adapts well to various jar sizes and wax types, though softer blends respond fastest. Active time usually stays under 10 minutes per jar, but the process requires stove supervision.
Practical Considerations
Patience pays off with thick wax layers – reheating is safer than forcing removal. Users often notice a visible ring forming around the wax within 30 seconds, signaling it’s time to start loosening. While versatile, this method isn’t ideal for jars with water-sensitive labels. When done carefully, it delivers clean jars ready for upcycling into storage containers or planters.
How to Clean a Jar After Removing Wax
Once most wax is removed, a thorough cleaning prepares jars for reuse or recycling. These simple household steps eliminate residue and restore glass to a sparkling finish.
Initial Soak
Start by soaking the candle glass jar in hot, soapy water for about 10 minutes. This loosens stubborn labels and softens any leftover wax film, making scrubbing easier later. For particularly tricky wax remnants, some find it helpful to freeze the jar first for 2 hours – this hardens the wax, allowing it to be scraped off cleanly with a butter knife.
Scrubbing Techniques
Use a sponge or bottle brush to scrub the interior, focusing on waxy residue or soot near the wick area. Narrow-necked jars benefit from a bottle brush’s reach. If microwave-safe glass has persistent wax, microwaving the jar for 30-second intervals softens residue for easy wiping with a paper towel. For adhesive from labels, apply a remover like Goo Gone, let it sit briefly, then wipe clean.
Drying and Final Touches
Dry the jar immediately after rinsing with a dish towel or paper towel to prevent water spots. Those reusing jars for food storage should rinse thoroughly after using chemical removers. Decorative jars with glitter or stickers require gentler handling – spot-test cleaners and avoid abrasive scrubbing to preserve designs.
Practical Tips
Always remove floating wax chunks from sink water before draining to prevent pipe clogs. When repurposing, many use cleaned jars for pantry storage (like snacks or baking ingredients) or bathroom organization. A fresh label gives them a personalized look.
Essential Tips and Safety Precautions for Removing Candle Wax
Handling candle jars safely prevents accidents and ensures effective wax removal. These practical guidelines cover key risks and preventive measures based on common experiences.
Handling Glass Safely
Glass candle jars can be delicate, so it’s crucial to inspect them before starting. Never attempt wax removal on cracked, chipped, or damaged jars – compromised glass may shatter unexpectedly during the process. Always begin with a fully cooled jar after the flame is extinguished. If the glass feels warm or the wick still glows, wait longer. Starting too soon risks burns or messy wax splatters.
Avoiding Hazardous Reactions
One critical rule: never pour water onto hot wax or a lit candle. This can trigger dangerous splattering, potential glass breakage, or steam burns. Instead, use a candle snuffer to extinguish flames safely. Thermal shock from sudden temperature changes remains a leading cause of jar fractures according to the National Candle Association.
Tool and Surface Safety
Skip sharp knives or metal tools that might scratch glass or cause injuries if they slip. Blunt instruments like spoons work better and reduce risks. When handling heated jars (especially during hot water or double boiler methods), oven mitts are essential. Always work on stable, heat-resistant surfaces to prevent slips and protect countertops.
Candle Burn Practices
For ongoing safety, stop burning candles when only ½–¼ inch (1.3–0.6 cm) of wax remains. Burning lower overheats the glass, increasing fracture risks. This also preserves jar integrity for reuse.
Special Considerations
Decorative candle glass jars with paint or glitter need gentler methods to avoid damaging finishes. Those planning to refill jars should note that original heating cycles may weaken glass over time. For recycling, thorough cleaning with soapy water is essential to remove all wax and wick residue. Always keep projects away from children and pets.
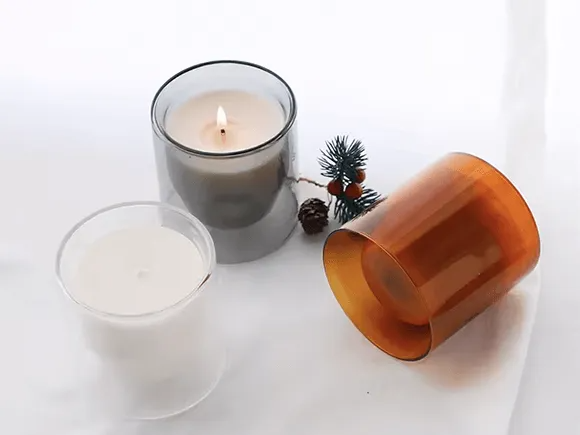
Conclusion: Reclaim, Reuse, and Elevate Your Glass Jars
Whether you choose the freezer, hot water, oven, or double boiler method, removing candle wax from glass jars unlocks endless possibilities for reuse. These simple, safe techniques transform spent candle containers into stylish organizers, planters, or DIY project bases—breathing new life into every jar. At TP Glass Bottle Manufacturer, we craft premium glass vessels designed for durability and elegance, making them perfect partners for your candle-making or upcycling ventures. Trust our expertise to deliver flawlessly finished jars that elevate your creations. Ready to start fresh? Your next beautifully reusable container awaits you.